![]()
Cartoview Core Installation | Docker
Introduction
This guide describes how to install and configure a fresh setup of Cartoview to run it in Production mode using Docker on Ubuntu 20.04 or Windows 10.
This part of the documentation describes installation of Cartoview-1.33.2 which comes with GeoNode-3.3.2.post1 and GeoServer-2.19.6.
Installation Requirements
For Ubuntu 20.04:
Install Docker
In order to be able to run Cartoview with docker engine, Docker Compose should be installed, but because it relies on Docker Engine, we will installdocker first from Docker official website.
Install Docker Engine, follow this guide. We recommend installing it using docker repository.
Install Docker Compose, follow this guide.
Note
The Docker daemon needs to use root privileges, so we must prefix each docker command with sudo, but if you want to run them without sudo, check How to manage Docker as a non-root user.
Check if Docker is installed successfully.
docker --version
# Docker version 20.10.10, build b485636

docker-compose --version
# docker-compose version 1.29.2, build 5becea4c
For Windows 10:
Install Docker Desktop
Docker Desktop is an easy-to-install application for your Mac or Windows environment that enables you to build and share containerized applications and microservices. Docker Desktop includes Docker Engine, Docker CLI client, Docker Compose, and many useful tools.
Walk through this guide to download and install Docker Desktop.
Proceed with installation and leave everything as default.
Docker Desktop does not start automatically after installation. To start Docker Desktop, Search for Docker, and select Docker Desktop in the search results.
When you see the Docker menu (A whale icon) in the taskbar stays steady, Docker Desktop is up-and-running, and is accessible from any terminal window.
Note
If you right-click on the whale icon, you can check multiple features like docker version, docker hub, dashboard, etc.
![]()
Docker Dashboard provides a useful interface to handle and control all the available containers easily. Please visit Docker Desktop Dashboard for more details.
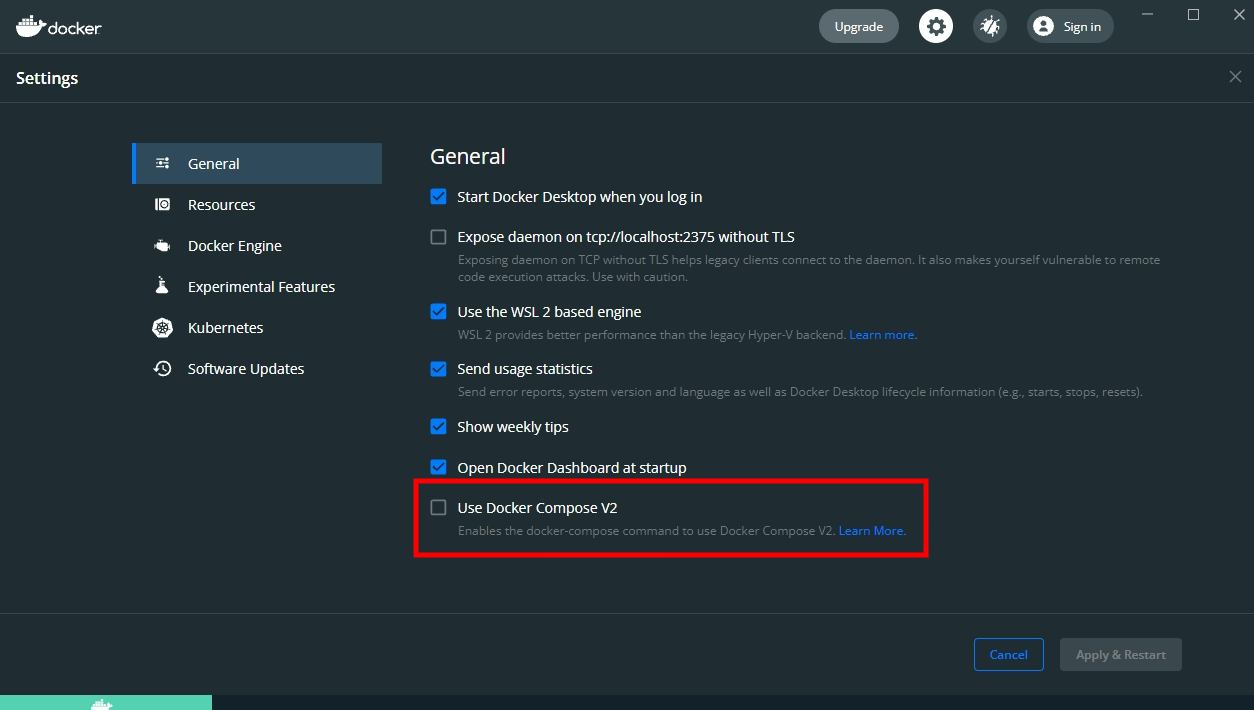
Docker Configuration
Make sure that Use Docker Compose V2 option is unchecked to avoid potential issues.
Cartoview Installation
Running Cartoview Docker Services
Download cartoview-1.33.2 by cloning the repository and using the tag v1.33.2.
git clone -b v1.33.2 https://github.com/cartologic/cartoview.git
This will create a directory called cartoview. Navigate inside it to build and run Cartoview with docker.
cd cartoview
docker-compose build --no-cache
docker-compose up -d
Note
-d is used to start up the containers daemonized, which means they will be started in the background (and keep running if you log out from the server or close the shell). docker-compose will take care to restart the containers if necessary (e.g. after boot).
Warning
For Ubuntu, if you didn't configure docker to run without sudo, make sure to prefix each docker command with it.
Get a cup of coffee and wait until all the images are pulled and installed successfully.
Warning
While installing using Windows Docker Desktop, you may be prompted to accept whether to give permission for Docker to mount its containers on one of your hard-drives or to not. Accept this so that the containers can run properly.
If you didn't accept, you will get errors. Execute docker-compose up -d again and accept.
After all images are downloaded, you can monitor the logs of initiating Cartoview with this command.
# This will show the logs of each service in the docker-compose.yml
docker-compose logs -f --tail=100

# Show logs only for cartoview service
docker-compose logs -f --tail=100 cartoview
For Windows Docker Desktop
If you open Docker Dashboard, you should find the installed containers up and running.
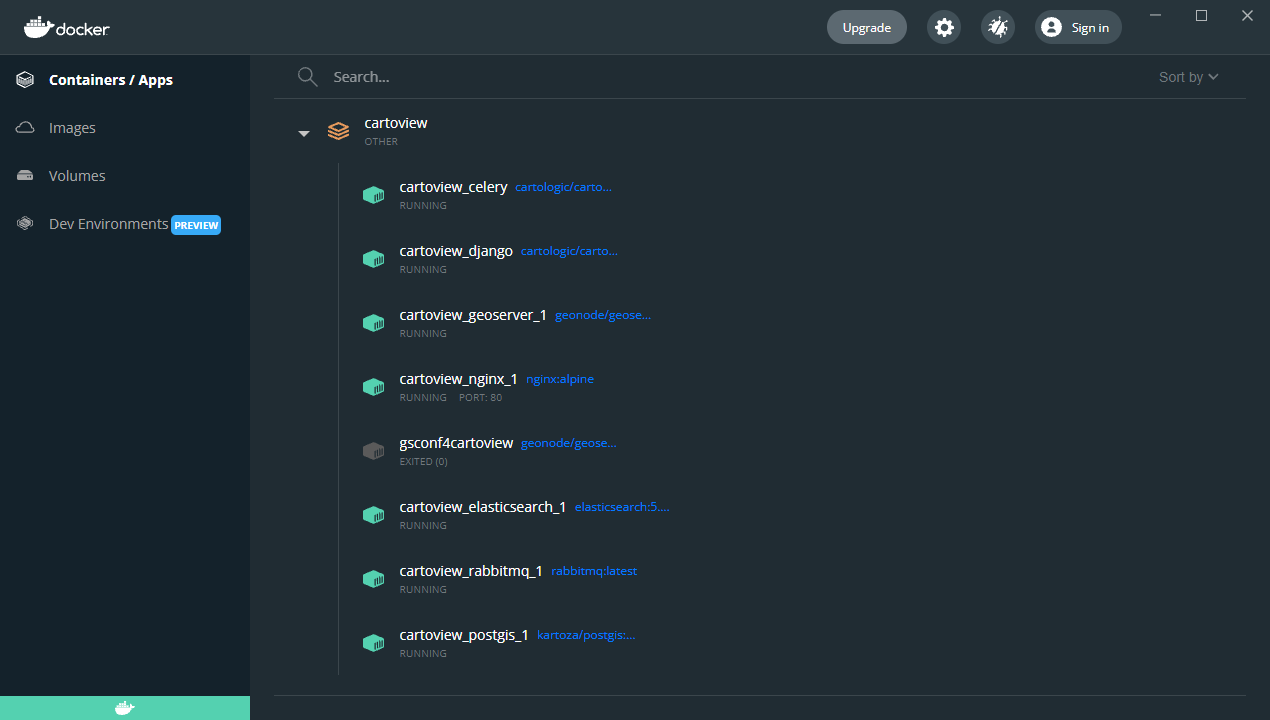
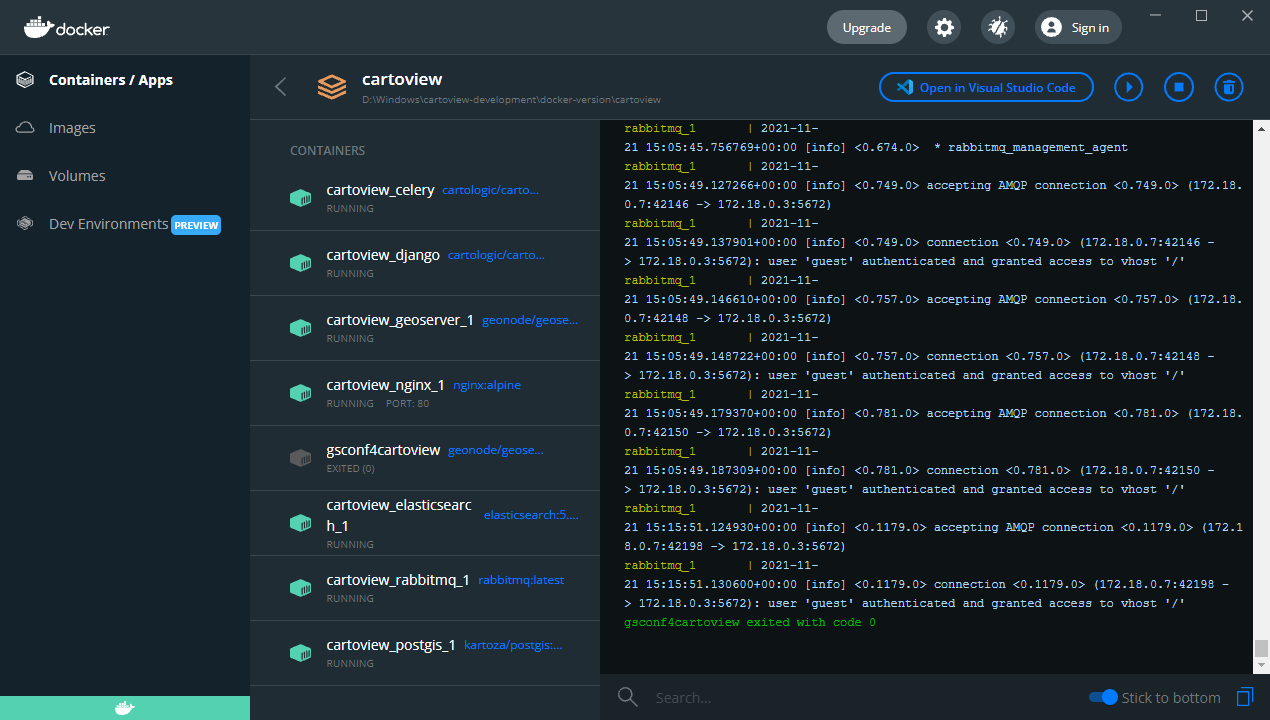
Also, you can see the logs by just double-click on cartoview.
Migrate & Load default data
We need to execute post-installation commands (e.g. migrations, collect static files, etc.) to make cartoview work properly after it's up and running. So we will open a terminal inside this service to execute these commands.
Use Make
If you have Make installed on your machine, you can just use the Makefile available at cartoview.
Note
- For Windows, if you don't have Make, install it from here.
- Make sure to add
make.exepath (e.g. C:\Program Files (x86)\GnuWin32\bin) to PATH system variable.
Warning
For Windows:
- All the comments found at the Makefile should be removed to avoid any potential errors related to Make.
- Replace the Unix sleep command with Windows timeout.
# This will go through the Makefile and execute the command called "run"
make run
Note
The command make run will execute a chain of commands that are required to make things work properly. You can check these commands in the Makefile available inside cartoview directory.
If you have used the previous command then you can skip the following ones.
For Ubuntu:
docker-compose exec cartoview bash
For Windows:
Open Docker Dashboard and for cartoview_django container, click on the Cli button to open the terminal in which we will execute the below commands.
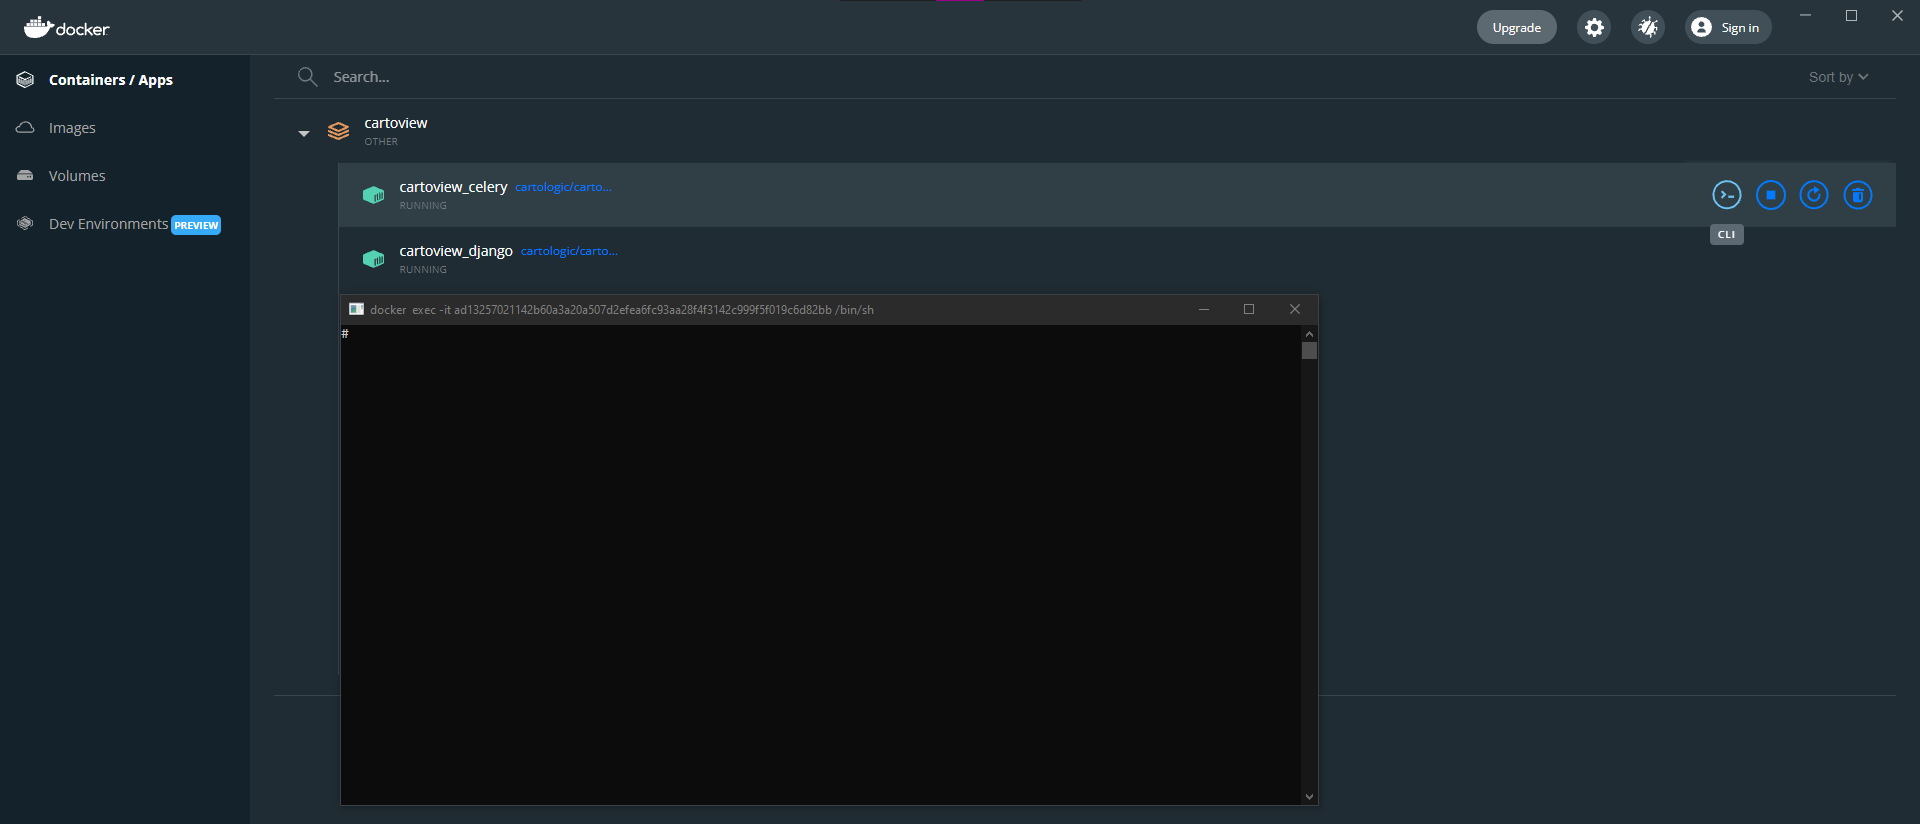
This will open a shell inside the container in which we will execute the following commands.
Migrate the data.
python manage.py makemigrations
python manage.py migrate
Load default User.
python manage.py loaddata sample_admin.json
Load default oauth apps so that you will be able to authenticate with defined external server.
python manage.py loaddata default_oauth_apps_docker.json
Load default Cartoview Appstore data.
python manage.py loaddata app_stores.json
Load default Initial Data for Cartoview.
python manage.py loaddata initial_data.json
In order to make the ArcGIS Importer app work properly, generate API keys.
python manage.py backfill_api_keys
Note
After executing the above commands, you can exit the container terminal by just typing exit then hit the Enter button.
Restart Cartoview services running on docker so that the changes takes effect.
docker-compose restart
Test Development Server
Check if Cartoview is working as expected.
Note
Cartoview is running on 10.5.0.4 according to a pre-configured external IP.
Warning
Do Not run Cartoview on localhost as it's not configured to work on that.
You should get:
You should be able to successfully log with the default admin user (admin / admin) and start using it right away.
Open GeoServer available at http://10.5.0.4/geoserver/

Make sure you're logged in with admin/admin in Cartoview at http://10.5.0.4/ then navigate to http://10.5.0.4/geoserver/ and click on the
GeoNode button to use the pre-configured authentication between GeoNode and GeoServer.

Note
You can also log in with the default GeoServer credentials admin/geoserver, but using GeoNode button is easier and quicker.
GeoServer Configuration
Optional | Change default password
Login with GeoServer credentials that were mentioned above.
At the left-side menu, navigate to Security section and click on Users, Groups, Rules.

Click on Users/Groups then select admin.

Set the password you wish then scroll to the end of the page and click Save.

Now, you can log out and login again with the new password you have just entered.
Post-Installation Notes
Congratulations! Cartoview is now installed successfully.
You can upload layers, create maps, and install Cartoview apps to visualize these maps.
Once Cartoview is installed, You can navigate to the apps page to check and install all available apps from the App Store.
After installing any app, you may need to restart cartoview docker services in order to install the app properly.
docker-compose restart
Collect static files using the command:
docker-compose exec cartoview python manage.py collectstatic --noinput
Or you can use the Make tool to run pre-configured collectstatic command.
# This will go through the Makefile and execute the command called "collect_static"
make collect_static