![]()
Cartoview Core Installation | Windows
Introduction
This guide describes how to install and configure a fresh setup of Cartoview to run it in DEBUG mode (also known as DEVELOPMENT mode) on Windows 10 64-bit clean environment.
This part of the documentation describes installation of Cartoview-1.33.2 which comes with GeoNode-3.3.2.post1 and GeoServer-2.19.6.
Warning
Those guides are not meant to be used on a production system. Instead, you can follow the Docker guide.
Note
The following steps will use shell commands that you must enter on a local terminal (e.g. CMD, Powershell, etc.).
If you plan to customize Cartoview & GeoNode user interface components to your needs, it's recommended to use Cartoview Windows Installer. Check the available Windows installer guide.
Installation Requirements
Python Setup
Download and install Python-3.8.10 32-bit.
Make sure to check the option Add Python 3.8 to PATH so that we can use it inside the local terminal.
Note
If Python is not added to PATH, check this tutorial regarding How to add Python to Windows PATH.

After installing, open your local terminal (e.g. CMD) and execute the following command to make sure python is installed and added to PATH correctly.
# Should print Python 3.8.10
python --version
Create a Python Virtual Environment
Make sure virtualenv is installed by executing:
# Should print virtualenv 20.10.0
virtualenv --version
Note
If virtualenv is not installed, install it with pip install virtualenv.
Create a folder in the directory at which you want to install Cartoview and Let's name it cartoview_service (You can name it whatever you want).
Inside cartoview_service folder, open your local terminal (e.g. CMD).
Create a virtual environment and call it cartoview_venv.
virtualenv cartoview_venv
Now after creating the virtual environment, activate it so that it can be used.
.\cartoview_venv\Scripts\activate
Note
You would notice how your prompt is now prefixed with the name of the virtual environment, cartoview_venv in our case. This indicates that your virtualenv is active.
Each upcoming command must be executed while the virtual environment is activated.
GDAL Installation
GDAL can be installed through OSGeo4W. But this time we need to install it manually inside our virtual environment.
Download GDAL‑3.2.3‑cp38‑cp38‑win32 wheel file from the Unofficial Windows Binaries for Python Extension Packages.
Install downloaded GDAL wheel file with pip in the virtual environment.
pip install GDAL-3.2.3-cp38-cp38-win32.whl

Database Installation
In this section we are going to install PostgreSQL database along with the PostGIS extension which is a spatial database extender for PostgreSQL. It adds support for geographic objects allowing location queries to be run in SQL.
Install PostgreSQL 13
Download PostgreSQL Windows installer certified by EnterpriseDB from here. We will use version 13.5.
Open the downloaded executable file and proceed with the installation.
Choose the components that you want to be installed in your system. It's recommended to leave it as default.

Note
This will install pgAdmin4 which is a GUI management tool for PostgreSQL database.
Enter a superuser password. This is the one by which you will access all your databases including what we will create next, so please save it.

Leave everything as default and continue.
Before click on Finish, make sure to leave the check on for the stack builder to start it after finishing.
Select PostgreSQL 13 (x64) on port 5432.

Install PostGIS-3.1 and select Next to download all the required files.

Select PostGIS. Click Ok for any prompt appears.

Now PostgreSQL database is successfully installed and running.
Access PostgreSQL
Using Terminal
We can access PostgreSQL through command prompt, but first we need to add the bin directory of PostgreSQL to PATH system variable.

Open a CMD terminal and connect to the database with user postgres with the password that you set during the installation.

Using pgAdmin4
In the search bar (beside windows icon), search for pgAdmin4 application and run it.
Set the master password that should be used each time you open pgAdmin4.

Navigate to left panel, under Servers dropdown, right-click and create a new server, we will name it Local PostgreSQL-13.

Add the server information including the password that you set during the installation.

Click Save. Now the installed PostgreSQL server is connected successfully to pgAdmin4.
You can now access PostgreSQL dashboard inside pgAdmin4.

Note
You may notice that there's an already created database called postgres that will be used to create Cartoview databases.
Database Configuration
In this section we are going to configure PostgreSQL to create and connect to Cartoview databases.
Update Access Policies for local connections
Update access policies for local connections in the file pg_hba.conf available at C:\Program Files\PostgreSQL\13\data to be able to connect to the database without password.
# "local" is for Unix domain socket connections only
# local   all             all                                     peer
local   all             all                                     trust
Restart PostgreSQL to make the change effective.
In the search bar (beside windows icon), search for Services and open it then navigate until you find postgresql-x64-13 and restart it.

Create Cartoview Databases
Create two new databases cartoview and cartoview_datastore.
You can create the databases using one of two approaches, through CMD terminal with SQL commands or using pgAdmin4 GUI.
SQL Commands with CMD
Open a CMD terminal and open psql command line.
# Open psql command line
psql -U postgres
# Create database named as cartoview and cartoview_datastore
CREATE DATABASE cartoview;
CREATE DATABASE cartoview_datastore;
Add PostGIS extension to the created databases to deal with the geographic objects.
For cartoview database:
# To be executed at CMD terminal
psql cartoview -U postgres

# To be executed at psql terminal
CREATE EXTENSION postgis;
Exit the PostgreSQL terminal with \q
For cartoview_datastore database:
# To be executed at CMD terminal
psql cartoview_datastore -U postgres

# To be executed at psql terminal
CREATE EXTENSION postgis;
Note
The previous step must be done for the two databases, cartoview and cartoview_datastore.
Using pgAdmin4 GUI
Open pgAdmin4 and under Local PostgreSQL-13 tree, right-click and select Create >> Database.

You will be prompted a pop-up to enter information about the database like the name and template.
Under General tab, set the name of the database to cartoview and under Definition tab, set the template to template0.

Add postgis extension to the created database cartoview.

Repeat the previous steps to create the second database, cartoview_datastore.
Cartoview Installation
As Cartoview is build on top of GeoNode, we need to install GeoNode first.
Install GeoNode
Navigate inside cartoview_service directory and make sure cartoview_venv is still activated.
Clone GeoNode-3.3.2.post1 from GitHub.
git clone -b 3.3.2.post1 https://github.com/GeoNode/geonode.git
Edit requirement.txt and setup.cfg files commenting the production and test packages alongside pylibmc and sherlock as they are not compatible with Windows environment.
Install GeoNode packages.
pip install -r requirements.txt --upgrade --no-cache --no-cache-dir
pip install -e .
Install Cartoview
Navigate inside cartoview_service directory and make sure cartoview_venv is still activated.
Download Cartoview 1.33.2 version by cloning the repository and checkout the release tag.
git clone -b v1.33.2 https://github.com/cartologic/cartoview.git
This will create a folder called cartoview inside cartoview_service.
Navigate to cartoview directory and install cartoview dependencies.
cd cartoview
pip install -e .
Add Cartoview Environment Variables
Cartoview requires adding some environment variables while running it or executing commands through terminal.
It's recommended to use PyCharm which is a powerful python IDE that has a lot of features to offer.
Create a new PyCharm configuration and add the following environment variables accordingly.

DATABASE_URL=postgis://postgres:postgis@localhost:5432/cartoview

DATASTORE_DATABASE_URL=postgis://postgres:postgis@localhost:5432/cartoview_datastore

ALLOWED_HOSTS=['*']

DJANGO_SETTINGS_MODULE=cartoview.settings

DEFAULT_BACKEND_UPLOADER=geonode.importer

It's required to add them also to the terminal configuration.

But the following variables only.
DATABASE_URL=postgis://postgres:postgis@localhost:5432/cartoview

DATASTORE_DATABASE_URL=postgis://postgres:postgis@localhost:5432/cartoview_datastore

ALLOWED_HOSTS=['*']
Note
This means that you must ONLY use Pycharm terminal in order for everything to work properly. To be able to use CMD, add the environment variables mentioned above to Windows by following this guide.
Import GDAL Library
As we have installed GDAL before, we need to import the location of its libraries into Cartoview settings.
Navigate to cartoview\cartoview\, create a file there called pre_settings.py, and add the following content.
import os
from distutils.sysconfig import get_python_lib


if os.name == 'nt':
    os.environ['Path'] = (r'%s\osgeo;' % (get_python_lib())) + os.environ['Path']
    os.environ['GEOS_LIBRARY_PATH'] = (r'%s\osgeo\geos_c.dll' % (get_python_lib()))
    os.environ['GDAL_LIBRARY_PATH'] = (r'%s\osgeo\gdal302.dll' % (get_python_lib()))
Import this file in cartoview\cartoview\settings.py to be before GeoNode settings.
...
from cartoview.pre_settings import *
from geonode.settings import *  # noqa
...
Import it also in cartoview\pavement.py.
As Django-2.2.24 doesn't support GDAL >= 3.0, we need to add the installed GDAL version inside django.
Navigate to django package in the virtual environment site-packages and modify the Django GDAL package python file libgdal.py available at \path\to\cartoview_service\Lib\site-packages\django\contrib\gis\gdal\libgdal.py according to the following.
# Replace this line
lib_names = ['gdal203', 'gdal202', 'gdal201', 'gdal20', 'gdal111']
# With this line
lib_names = ['gdal302', 'gdal203', 'gdal202', 'gdal201', 'gdal20', 'gdal111']
To make sure everything is working properly, open Pycharm terminal and make sure the cartoview_service virtual environment is activated, navigate inside cartoview_service/cartoview, and run the following command.
python manage.py check
Should print something like this:

Migrate & Load default data
Inside cartoview folder, run the below commands to migrate and load Cartoview data.
Warning
- Make sure the virtual environment is still activated (If you see its name prefixed your prompt, you're good to go).
- Make sure to add the above environment variables to the terminal so that the following commands run smoothly.
Migrate the data.
python manage.py makemigrations
python manage.py migrate
Load default User.
python manage.py loaddata sample_admin.json
Load default oauth apps so that you will be able to authenticate with defined external server.
python manage.py loaddata default_oauth_apps.json
Load default Initial Data for Cartoivew.
python manage.py loaddata initial_data.json
Load default Cartoview Appstore data.
python manage.py loaddata app_stores.json
Collect static files.
python manage.py collectstatic --noinput
In order to make the ArcGIS Importer app work properly, generate API keys.
python manage.py backfill_api_keys
Test Development Server
Check if Cartoview is working as expected.
python manage.py runserver 0.0.0.0:8000
Open a browser and check if cartoview is running at localhost:8000.

You should be able to successfully log with the default admin user (admin / admin) and start using it right away.
Now we have Cartoview up and running. The last thing we need to do, is to install and configure GeoServer.
GeoServer Installation
Cartoview comes with a pre-configured GeoServer available by GeoNode. So it can be installed with Paver commands.
If you check the pavement.py file, you can see multiple created tasks like, setup_geoserver, start_geoserver, and stop_geoserver.
Install Java and OpenJDK
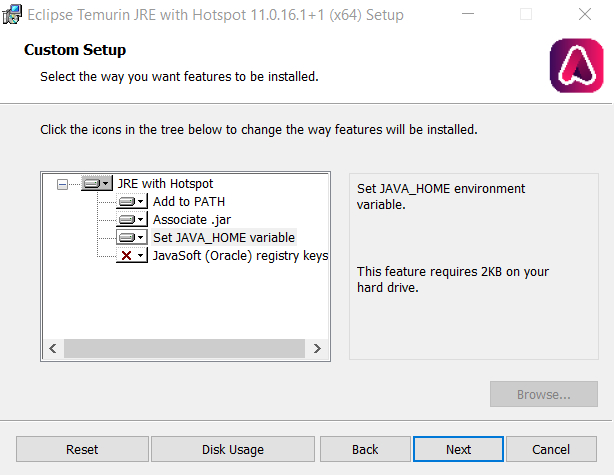
As GeoServer is built with Java, make sure you have a Java Runtime Environment (JRE) installed on your system. GeoServer requires a Java 8 or Java 11 environment, as provided by Adoptium Windows installers. The current version is jdk-11.0.16.1+1.
During the JRE setup, make sure that Add to PATH and Set JAVA_HOME variable are selected.
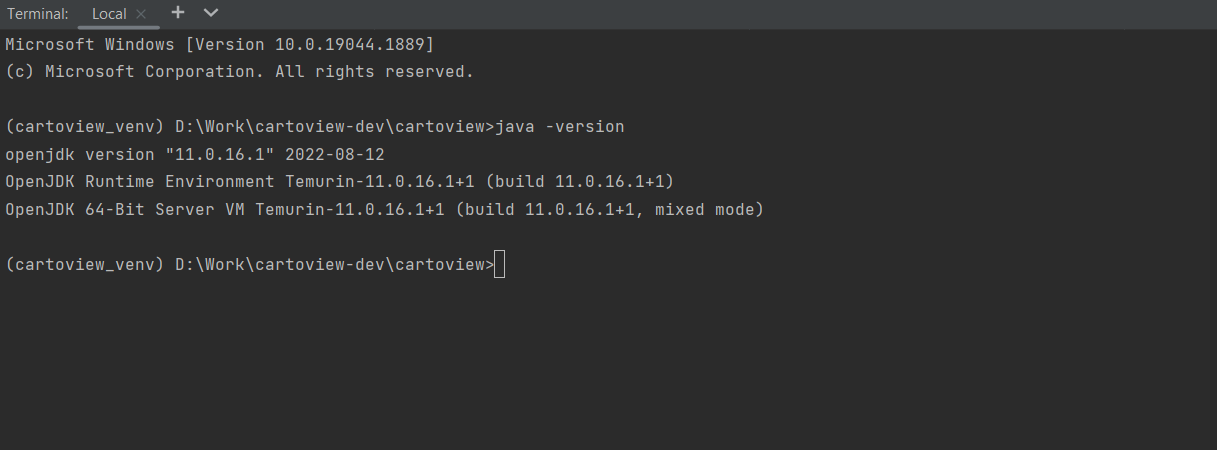
After installing, close pycharm's terminal and re-open it.
Note
You may need to restart Pycharm after installing Java.
java -version
Warning
- Make sure the virtual environment is still activated (If you see its name prefixed your prompt, you're good to go).
- Make sure to import
cartoview\pre_settings.pytopavement.py.
Run the task called setup_geoserver to download a customized version of GeoServer WAR file (provided by GeoNode) and setup jetty.
Note
- Jetty provides a web server and servlet container. It's used to host GeoServer.
- The file called
dev_config.ymlholds the download URL for GeoServer and Jetty.
paver setup_geoserver
This will create two folders, the first one called downloaded, it contains the downloaded required files and geoserver which contains all the files related to GeoServer.
Start GeoServer
Run the task called start_geoserver to launch jetty on port 8080 and start GeoServer.
Warning
Make sure nothing is running on port 8080.
paver start_geoserver

GeoServer is now available and running at http://localhost:8080/geoserver/.

Make sure you're logged in with admin/admin in Cartoview at http://localhost:8000/ then navigate to
http://localhost:8080/geoserver/ and click on the GeoNode button to use the pre-configured authentication between GeoNode and GeoServer.

Note
You can also log in with the default GeoServer credentials admin/geoserver, but using GeoNode button is easier.
You can change the admin password by navigating to Security > Users, Groups, and Roles. Select Users/Groups tab, select admin user, and you can now update the password as you want.

Stop GeoServer
GeoServer can be stopped by running the task stop_geoserver.
paver stop_geoserver
Note
When GeoServer is stopped, the jetty server got down also but all the uploaded data (e.g. layers) is saved in the folder called geoserver in cartoview directory.
Post-Installation Notes
Congratulations! Cartoview is now installed successfully.
You can upload layers, create maps, and install Cartoview apps to visualize these maps.
Note
If you got an error like the following message while uploading a layer, make sure to remove the PROJ_LIB environment variable from Windows system environment variables.
RuntimeError: PROJ: proj_identify: C:\Program Files\PostgreSQL\13\share\contrib\postgis-3.1\proj\proj.db lacks DATABASE.LAYOUT.VERSION.MAJOR / DATABASE.LAYOUT.VERSION.MINOR metadata. It comes from another PROJ installation.
Once Cartoview is installed, You can navigate to the apps page to check and install all available apps from the App Store.
After installing any app, you may need to restart the running django server if you can't see your app in /cv_apps.